Friday, June 1, 2012

I Made Bagels!

I have to admit, I was intrigued when I found a recipe for home-made bagels. 
I caved when they said it was easy. 

Easy it was. 
It just took awhile. 
Three 20-minute dough rests. 

They taste like they came straight from the deli!
Can you smell them yet? 

I followed this recipe
I didn't vary from it, so please visit the site for details.


This is what's resting in the green bowl: 
oil, all-purpose & whole wheat flour, sugar, yeast, water

Kneading, kneading...


 ...and kneading. 10-minutes worth!

 The wonderfully elastic dough:


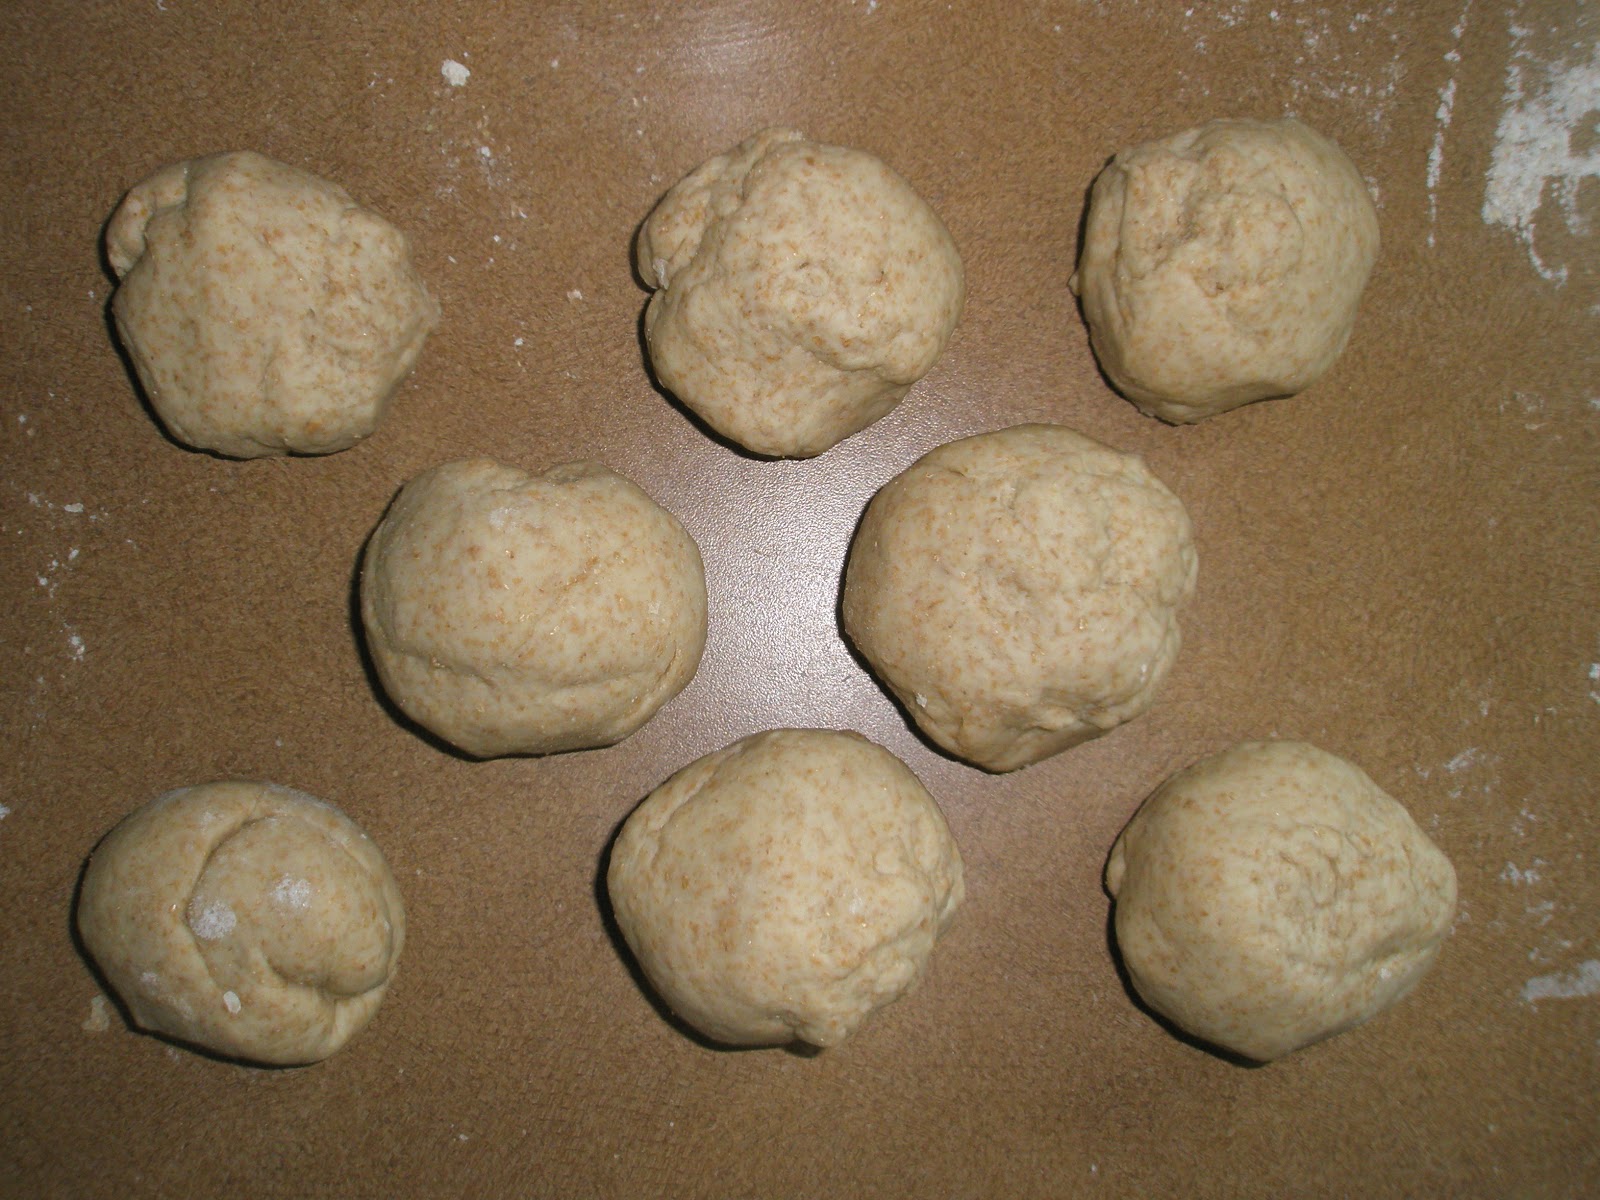
 Cut into 8 balls and resting for 20 minutes:

Then rolled into 8 dough snakes.

These did not roll out as easily as Play-Doh. 
I would know, I teach 6 & 7 year olds. 
Curled into 8 bagel-like rings.
And yet another 20 minute rest. 

Boiling:

In water. 
1-minute each side.
This is apparently the sign of a "real" bagel. 
A quick drip-dry:

And then onto the baking sheet!
After baking for 10 minutes on each side, they are done!
And soooo good!
Time-consuming, yes. But truly easy. 
And your kitchen will smell like a bakery. Bonus!
Thinking I'll make these again for our upcoming weekend camping trip.

Saturday, May 26, 2012

Leftovers Brunch


Last night, we were went to my folk's house for a BBQ. 
On the menu: Salmon burgers, grilled asparagus, and a fruit tart. Nom, nom, nom. 

The best part: Mom sent us home with the left overs.  

This morning, I used the left over salmon burgers in a delectable omelet. Nom, nom, nom. 

Doesn't it look good with my favorite oatmeal cookie pancakes, fruit smoothie, and Chai tea. 


Ingredients: broken up salmon burger, grated cheese (mozzarella here, but I would have loved to have found Gruyere in my fridge this morning), diced onion, and fresh parsley. 

Saute the onion.
Beat the eggs with milk. 
I had a lot of filling, so I used 7 eggs and about 1/2 cup of milk. 
Pour into a large, hot frying pan. 
 
I watched a TV show one time in which they discussed omelets (thrilling, I know). 
I learned that they were traditionally a mid-day meal, made large, and served family style. 
I like this idea. There's less time commitment at brunch when you eliminate the many, smaller, made-to-order egg options.

When the egg is 90% cooked, spread the fillings across the top and carefully fold over.

Sometimes, with even the greatest of care, things fall apart. 


That's why it is always important to reserves some of your fillings for the topping.
 
Melted cheese and herbs will hide any number of errors in the kitchen (so will liquored up guests. Make sure that Mimosas, Screwdrives, or Bloody Marys are readily available for your friends and family).

Now you're ready to dish up and eat! Preferably in a beautiful garden buzzing with bees, butterflies, and birds. Here's a few snapshots from mine:


 PS- I wish I knew an easy way to get all these pics of my garden grouped together more nicely. It's like trying to pose a family photo.

Thursday, May 17, 2012

Cosmetics

Cosmetics can be dangerous!

And I'm not talking about when your husband sneaks up behind you while you're applying mascara. I mean that cosmetics are full of toxic chemicals! Even the ones advertised as "natural" or "organic" can have some pretty nasty things in them.

I have spent several years researching different cosmetics products and lines that are safe both for my body and the planet. My biggest resource has been the Skin Deep Cosmetics Database.

Not only do they tell you which products are safe and unsafe, but they also tell you why! Listing ingredients that are carcinogens, allergens and more. Each product is given a safety rating and color code: 0-2 is green and safe; 3-6 is yellow and moderate in concern; 7-10 is red and contain products that pose a "high hazard."

While this data base has been a huge help to me, there are still some challenges in my research. I am continually trying to balance price, safety rating, and effectiveness.


1. Finding drug store (ie. affordable!) brands and products.
2. Finding products with-in brands that are safe (one company may have safe mascara, but hazardous bronzer or one color (ivory) may be safe while another color (fair) is hazardous)
3. Finding safe, affordable products that work!
4. Companies reformulating products (formerly safe products are now hazardous, formerly hazardous products are now safe).

I don't use a ton of make-up, but when you apply this thinking to your entire bathroom of products from hand soap and shampoo, to deodorant and moisturizers there are many more products than one would first imagine. Then broaden the concept to include dish soap and laundry detergent - it gets a little overwhelming.

(Side note: If you have been following the blog, you may have run across some of my attempts at natural, home-made housekeeping/cleaning.)

As I said, I have put years of leg work and research into the products I am currently using and I am no where near close to "loving" every product I use. In case you didn't know, mascara is a (forgive my french) be-otch!
Make-up products I am currently using (along with their rating). I would not be using them if they weren't affordable. Anything with SPF seems to automatically have a higher rating.

Moisturizer: Aveeno Active Naturals Daily Moisturizing Lotion (rating: 2). Now that the sun is out and I'm no longer bundled up in sweaters, I use the SPF 15 version of this moisturizer (rating: 3).

Daily facial moisturizer: Cetaphil, SPF 15 (rating: 3)

Night cream/ Facial cleanser: Yes to Carrots, fabulous for my uber dry, sensitive skin (rating: 3/2)

Eye cream: I once heard somewhere that if you want to minimize crows feet, you start using eye cream before they appear, not after. I have been using eye cream since my early 20s (about the same time I found my first grey hair. Coincidence?) I currently use an old Earth Science formula: "Azulene Eye Treatment." (rating: 3)

photo from: Erth Mineral Makeup
Makeup: I have yet to find a safe/affordable combination from my local drug store. So I went online. Skin Deep offered Erth Minerals as one of their top companies. So I tried them out. I use their foundation, concealer, eye primer (a must, I discovered, for mineral eyeshadows to "stick"), eye shadows, and mascara. I love all the products. Except the mascara. It's weak-sauce! My search for the perfect mascara continues. I love mascara (its the one product I'd want on a deserted island). Let me know if you have any good leads.

As far as liquid foundations go: For a while, I was using Physicians Formula Organic Wear 100% Natural Origin Tinted Moisturizer. I found this product to be a bit on the "oily" side. May not be a good choice for some. My skin is VERY, chronically, dry and flaky - my skin was not bothered by this factor. I only went away from it because I don't need much coverage and wanted to try mineral makeup. 

Sunscreen: For the summer, it's the most important, right? Coppertone Water Babies Pure & Simple Sunscreen Lotion, SPF 50 (rating: 2 - by the way, I was shocked by this awesome rating for a cheap, drugstore product. Especially a suncreen! Score. Major score.)


So, I've been at this research for a while now. I've been trying my hand at home-made housekeeping formulas. I recently stumbled upon this while perusing Pinterest. Will this be my next route? Watch out!

Incase you're wondering, I use other products beyond this list (including a really unsafe hairspray, yikes!). These are just my researched, routine products.

Hope I didn't scare you off. 


Monday, April 23, 2012

Surprise Garden


Well, spring is here and this past weekend brought 80 degree weather to SE Washington! 
It also lured me into my garden. 

Look what was there to greet me:

Last year's Parsley wintered over!

 Along with the chives and a few perennials.

There were also many, many bugs. Some were unwanted, like the aphids and wasps. 

Ugh!
While the tulips are certainly bright and sunny,
the aphid infestation makes me want to gag and leaves my skin crawling!
They were all over my roses too. Pruning was a nightmare. 


The ladybugs have been ordered and should arrive this week. 
(Lady bugs will be a first for me, wish me luck)
 Some bugs are VERY wanted. 
Can you see the Praying Mantis egg on the fence? 
I get one every year, and it is always fun to discover each year's nest.  


This year, it didn't take too long to put in the garden. I'm trying to go a bit more low-maintenance (i.e.: cheaper!) by using more perennials. More up front cost, but lasting results. So I dug up bulbs last fall, added a few additional ones to my collection this spring, and put them all in the ground. Along with moving a few herb shrubs and planting a few veggie seeds the garden is already in good shape. I even have salad greens sprouting! Mmm, mmm, good.

I do have a few more things to get, but I am thrilled with how easy it was to get the garden set this year. Still to come: I'm going to try ordering a Bay Leaf tree and try it in my garden (anyone have any suggestions on how to help it winter over?). I'll be picking up some chamomile and echinacea for some planters and I'm still debating a tomato plant this year. The growing tomatoes for canning didn't go as I expected last year, but the idea of fresh summer salsa is sure appealing (any suggestions on varieties?).

Oh, and BIG bonus share. I found a cheap, eco-friendly weed killer! In the past I have just gone the old fashioned route and pulled them out by hand...but with my sensitive skin and grass allergies, this has always been a challenge for me (I'm talking rash-city--yukka!). I recently read that plain ol' white vinegar will safely kill the weeds. I tried it out this weekend and am quite pleased with the results. The weeds are drying up. However, I do have some "burn" marks in my lawn, apparently the vinegar will kill all plant life. But hey, grass comes back with a vengeance this time of year!

Any surprises in your garden?

Sunday, April 8, 2012

Revisiting Soap

This liquid soap has a better consistency!

A while back I posted about an attempt to "make" soap. It worked well enough. However, the soap was very thin and watery.

So I thought I'd give it another go with a different recipe.

This time I tried to reformulate bar soap into liquid soap from two body bars. I love Burt's Bees. It is a relatively "safe" product (more on this to come...I am still researching...) and smelled fantastic!

Ingredients: 2 bars of soap, 2 T vegetable glycerine, 1 gallon water
Tools: cheese grater and large cooking pot.

I bought cheap tools to designate for soap making as I didn't want to mess with my good cooking tools. Unfortunately, I did run into some trouble with my cheap stock pot...it leaked!!!

I grated the two bars of soap into the pot:


 Then added 2 T glycerin and 1 gallon of water:

I set the pot on the stove and turned the temp to medium and left it be until all the soap dissolved. It took about 20 minutes. After that, I removed it from the heat, put a lid on it and left it be until the next day (it's when I had time again....they say it's good to go after 10-12 hours, but I had no trouble 24 hours later).

My pot leaked at the handle fasteners. I put a plastic dish pan underneath and it was no big deal.
That's what cheap kitchenware gets you. Oh well.
 On first appearance, the now liquid soap looked rather solid and I was worried I was going to have to remelt and thin the concoction. My husband suggested that it didn't look that solid and why don't I just try mixing it up? So I stuck my hands in and did just that. Worked like a charm. It was the perfect consistency and I just funneled it into my hand soap containers.

By the way, I am keeping one of these hand soap containers in my shower as body wash. It's more that I'm using body wash as hand soap, instead of the other way around (for those of you who are concerned about those kinds of things).

"Homemade" liquid hand soap!
Remember that milk gallon from the top of the post?...that's my storage container. The two body soap bars yielded 1 gallon of liquid body soap!

PS...I think I used this recipe...but I've been perusing soap recipes so long I'm not sure anymore. They're all really similar.

Friday, March 30, 2012

Meal Planning

Meal Planning. It's every working homemakers' advice for saving money, facilitating smooth meal times, and expedited shopping. 

I meal plan every week. I write out my shopping list based on the meal plan. However...
my system was ineffective. 

I would have 0 inspiration for 7 nights worth of meals. My husband's response to, "Babe, what do you want dinners this week," is a predictable coin toss between "Whatever," and "I dunno."

I would write out the meals on the grocery list and throw the list away.
I would write out the list on a separate piece of paper and then loose the paper.

I bought a dry erase board. 
My markers were always dried out or the list got wiped away.

(As a teacher, the phenomenon of dried out markers amazed me. At school, I always have a good dry erase pen at the ready.)

I finally got inspiration:
(from Pinterest)
http://clairsfairytale.blogspot.com/2012/01/ultimate-menu-board.html


I made a shopping list. I looked something like this: 
clothes pins, frame, scrapbook paper, little boxes

I went to the store and it all seemed like so much work...ugh. 

Then I stumbled upon these:
My mind said, "What crafty little magnets!" 


And I had an "A-ha!" moment. 
With these magnets, some index cards, a magnetic pen box (!), and the side of my fridge I was set.

I got home and wrote down meal options on 1 1/2-inch strips of index cards, placed them in the box (along with a Sharpie and a few blank cards for ever-expanding options).


Then I planned out a week's worth of meals. 


Now when I am uninspired at shopping time, I can ask my husband to look through the options and create a menu. 


Saturday, March 17, 2012

Pin-spiration

I found this fun little "apple pie" on Pinterest. 


But the recipe was in an indiscernable (to me) Asian language. 
So I took the Pin-spiration, and tried it out. 

 I diced up 3 apples and tossed them with cinnamon and sugar:


 I rolled out my favorite pie crust recipe and placed the apples in the center:


 I cut flaps into the crust:


 And then alternated folding the flaps across the apples at an angle. 


Then I popped it into the oven at 350 for 35-45 minutes 
(my crust recipe calls for 35 minutes, but I always have to go longer for a golden crust).


Here's my pie crust recipe, if you need one.

Pulse these ingredients in a food processor to combine:
1 1/2 c flour
1/2 cup powdered sugar
1 stick of butter, cut into pieces

Then add 1/4 cup lemon juice and, again, pulse to combine.

Ball up dough and cover with plastic wrap. Chill in fridge for 10 minutes. Then it's ready for use.