Friday, March 30, 2012

Meal Planning

Meal Planning. It's every working homemakers' advice for saving money, facilitating smooth meal times, and expedited shopping. 

I meal plan every week. I write out my shopping list based on the meal plan. However...
my system was ineffective. 

I would have 0 inspiration for 7 nights worth of meals. My husband's response to, "Babe, what do you want dinners this week," is a predictable coin toss between "Whatever," and "I dunno."

I would write out the meals on the grocery list and throw the list away.
I would write out the list on a separate piece of paper and then loose the paper.

I bought a dry erase board. 
My markers were always dried out or the list got wiped away.

(As a teacher, the phenomenon of dried out markers amazed me. At school, I always have a good dry erase pen at the ready.)

I finally got inspiration:
(from Pinterest)
http://clairsfairytale.blogspot.com/2012/01/ultimate-menu-board.html


I made a shopping list. I looked something like this: 
clothes pins, frame, scrapbook paper, little boxes

I went to the store and it all seemed like so much work...ugh. 

Then I stumbled upon these:
My mind said, "What crafty little magnets!" 


And I had an "A-ha!" moment. 
With these magnets, some index cards, a magnetic pen box (!), and the side of my fridge I was set.

I got home and wrote down meal options on 1 1/2-inch strips of index cards, placed them in the box (along with a Sharpie and a few blank cards for ever-expanding options).


Then I planned out a week's worth of meals. 


Now when I am uninspired at shopping time, I can ask my husband to look through the options and create a menu. 


Saturday, March 17, 2012

Pin-spiration

I found this fun little "apple pie" on Pinterest. 


But the recipe was in an indiscernable (to me) Asian language. 
So I took the Pin-spiration, and tried it out. 

 I diced up 3 apples and tossed them with cinnamon and sugar:


 I rolled out my favorite pie crust recipe and placed the apples in the center:


 I cut flaps into the crust:


 And then alternated folding the flaps across the apples at an angle. 


Then I popped it into the oven at 350 for 35-45 minutes 
(my crust recipe calls for 35 minutes, but I always have to go longer for a golden crust).


Here's my pie crust recipe, if you need one.

Pulse these ingredients in a food processor to combine:
1 1/2 c flour
1/2 cup powdered sugar
1 stick of butter, cut into pieces

Then add 1/4 cup lemon juice and, again, pulse to combine.

Ball up dough and cover with plastic wrap. Chill in fridge for 10 minutes. Then it's ready for use.


Thursday, March 15, 2012

Enchilada Sauce

So...I think I cook in spurts. 
I'll get a little fire in my belly and try all kinds of new recipes, experimenting in the kitchen. 

Then, nothing. 
For weeks. 

I get too tired, busy, unimaginative, stuck in a rut. I rely on the tried and true, boring and basic food. 

Have you noticed there haven't been any posts about food for a couple of weeks?

Apparently, I'm in another rut. 

Yikes! My poor hubby. Good thing he'd happily live on cans of baked beans if I let him. (Yuck-A!)

It's a good thing I keep the camera close at hand when I get into my cooking spurts. 

Today, I just happened upon these enchilada sauce photos. Enjoy!
I think I got the recipe here?

This must be a can of tomato sauce (8oz) with 
flour (3 T), chili powder (3T), oregano (1T), garlic salt (1/2t), and cocoa powder (1t):

Stirred into a paste:

Combined with water (1c) and reduced on the stove over low heat:

Oh! 
Look-y here. 
More photos. 

I guess I made enchiladas that night as well!
That must be the sauce reducing on the back burner, 
black beans up front, and onion & garlic in the skillet. 

Oohh...I see some yummy cheese all shredded up over there as well.

This is making me drool. They look sooo good. 
We need a fiesta so I can make these again!


There it is in a jar: 

Beautiful red enchilada sauce. 
I wonder how authentic it is?

Thanks for taking this stroll down food-memory lane with me!

Saturday, March 10, 2012

Soap Scum

Each weekend, my husband and I spend a bit of time maintaining the cleanliness of our home. We pick up clutter, dust, vacuum, clean the bathroom, and do all of the little necessities to help keep our house up to snuff.

Confession: This is not true of our master bathroom. It's a tiny little room tucked away at the back of the house and you wouldn't even know it was there unless we told you about it. No one ever sees it but us. This bathroom is quite literally my dirty little secret. I suppose that the cat's out of the bag now. It's something I tell my self I'll get to later, when I have more time. No one will know anyway. And then I wake up one morning and realize the filth that it has become. I hope I'm not the only one with a room like this, but if I am, well...I guess I'm a work in progress.

Until now.

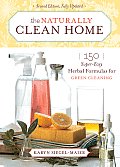
Today, amped up on way too much coffee for a Saturday, I went after that long neglected bathroom. And I did it using some of the heavy duty cleaning recipes in my new favorite housekeeping guide, The Naturally Clean Home

My dirty little secret now shines.
I watched in awe as soap scum melted off the shower wall. Not since I moved in have I seen my shower so sparkly white. Passed attempts with Comet have not delivered these kinds of results. I hollered to my husband to come look at the shower (turns out, men do not get excited about these kinds of things). Now I'm not sure I want to use it -- it's too pretty to spoil!


People, I am in love.
With baking soda, vinegar, borax and salt. 

Who would have thought it possible? These simple, inexpensive items (along with a little elbow grease) work together to create a cleaning miracle. Icing on the cake (could it get better?): these natural ingredients contain no harsh chemicals, no fumes, no pollutants. Some recipes in the book even recommend cleaning with your bare hands to - get this - soften your skin!


Wanna come see my bathroom? I feel like throwing a party in it.

Here are the recipes I used. All came from The Naturally Clean Home.
Thank you, thank you Karyn Siegel-Maier! You have given me a cleaner, greener, home.

Fizzy Bathroom Sink Cleaner
Combine ingredients, pour into sink and scrub away.
1/2 c baking soda
6 drops lemon essential oil
1/2 c vinegar

Soap Scum Remover 
(aka, miracle shower formula)
1 T baking soda
1 t salt
2 drops essential oil
vinegar

This recipe wasn't going to be enough for my nasty shower. 
So I "guess"-timated an increase:

Into a large measuring cup, I poured about 1/2 cup baking soda, covered that with salt, and added about 20 drops of lemon essential oil. 
Then, I followed the recipe and added enough vinegar to make a paste. I dipped a scouring pad into this paste and went at my shower. 
I worked up a bit of a sweat, but the results are well worth it!

Easy-Does-It Bowl Cleaner
Combine ingredients and pour into toilet. Then swipe with brush.
1/2 c baking soda
1/4 c white vinegar
10 drops tea tree essential oil

Germs-Be-Gone Toilet Cleaner
Combine in a spray bottle:
2 cups water
1/4 c liquid castile soap
1 T tea tree essential oil
10 drops eucalyptus or peppermint essential oil 
(I have yet to include this in my repertoire of oils, so I used my lemon oil instead)

A note on "Germs-Be-Gone": 
In the past, I have used a commercially-produced, natural all-purpose cleaner to clean my toilet and my bathroom surfaces (sink, counters). 
I applied the same thinking to this recipe and made it my all-purpose cleaner.


Sunday, March 4, 2012

Homemade Soap

I've been preparing to take steps toward making my own soap. I've read recipes, bought ingredients, and waited for a day when I had the time to invest in the project.

Well, turns out "homemade" soap is much simpler than what I initially thought (as so many "whole" things turn out to be). A recent trip to Portland and the legendary Powell's City of Books turned up this wonderful little gem:
This little book helped me focus in on my goal for wanting homemade soap.

The goal is purity.
Soap free of dyes, perfumes, chemicals and anything that doesn't need to be in there.

Virtually all of the "Super Easy Herbal Formulas" in this book required either Borax, castile soap, or both (with the addition of some essential oils).

Enter in Dr. Bronner's Magic Soaps:
Apparently all I need is a few ounces of this stuff diluted in water and "spiced up" with some essential oils, and voila! Pure, "homemade" hand soap, dish soap, body wash, shampoo... You name it, it seems like the sky's the limit here. And all with the same stuff! This is quite a game changer for me- I have a hard time wrapping my head around this concept!

I am starting small to see how it goes and I may expand from there. I have so far refilled my dish soap bottle, my hand wash bottle, and created a body wash from castile soap.

From reading The Naturally Clean Home, it seems that essential oils do a few thing for cleaning:

  • they help to enhance the cleaning power of the mixture
  • citrus oils (in particular) are natural degreasers and have antimicrobial properties
  • they provide a soothing, natural scent
Ms. Siegel-Maier (author of The Naturally Clean Home) provides recipes for combining essential oils, and the differences seem to be personal preference on fragrance. I'm experimenting with a lemon-mint combo. 

The hardest part for me was determining how to dilute the Dr. Bronner's. It comes concentrated with no directions on the bottle!

After searching a few websites, it seems that for household cleaning a 1:40 ratio of castile soap to water will do the trick. 

For bodily cleaning, most recommendations were for a few drops in the shower to clean the skin and hair. I bought my Dr. Bronner's in bulk and wanted a more practicle solution. So I'm experimenting with 2 oz of castile soap per 12 oz bottle. 

Wish me luck!

Other, more serious cleaning recipes (bath tub, oven, toilet, laundry) in The Naturally Clean Home call for Borax and other common household items (like salt and baking powder). Stay tuned...

(Images courtesy of powells.com & drbronner.com)