Showing posts with label Breads. Show all posts

Monday, November 12, 2012

Come Back


Apparently I have been on hiatus. 

Unintentional, but still, a hiatus.  

I remember over the course of the last, what is it? 6 months, maybe?, that I thought to myself, "Well, I'll just let it go. There's no time." For writing a blog of course, not for cooking. There's always time for cooking. 

The blog just didn't seem to be working for me. But way back in the spring when I first realized I had a much neglected blog, a fellow blogging friend said to me, "But you do it for yourself," and that stuck with me. 

My blog writing has always been for me. A way to chronicle my kitchen endeavors and trials at new recipes. A way to hold myself accountable to whole foods.

However, just because it is homemade, doesn't mean it's healthy.
My downfall: Baking. 
 
I love to bake.
I've always said, if I ever leave education, a bakery will soon follow. And there is so much more to bake than healthy whole grain breads. I am obsessed with perusing cake recipes, and frosting recipes, sweet roll recipes, and pie recipes... 

I must remember to eat my vegetables. 
But not today! 

Today I have a hankering for cinnamon rolls and it was the perfect day for them. A lazy Sunday afternoon was the opportunity to indulge in my baking obsession (lazy only because I have a day off from work tomorrow and those pesky chores and case studies can be put off until then). 

I had seen this clever guy on pinterest (of course):
image linked to website

But naturally it was written in a foreign language.

So I went to one of my favorite recipe sources (Smitten Kitchen always provides great inspiration) for a plain old cinnamon roll recipe and I stumbled upon this:

chocolate swirl buns
image linked to Smitten Kitchen's recipe
Chocolate swirl rolls on a Sunday afternoon! Yes please! 
But then I realized I didn't have the chocolate chips Deb required. 

So, improvisation was the next logical step. 

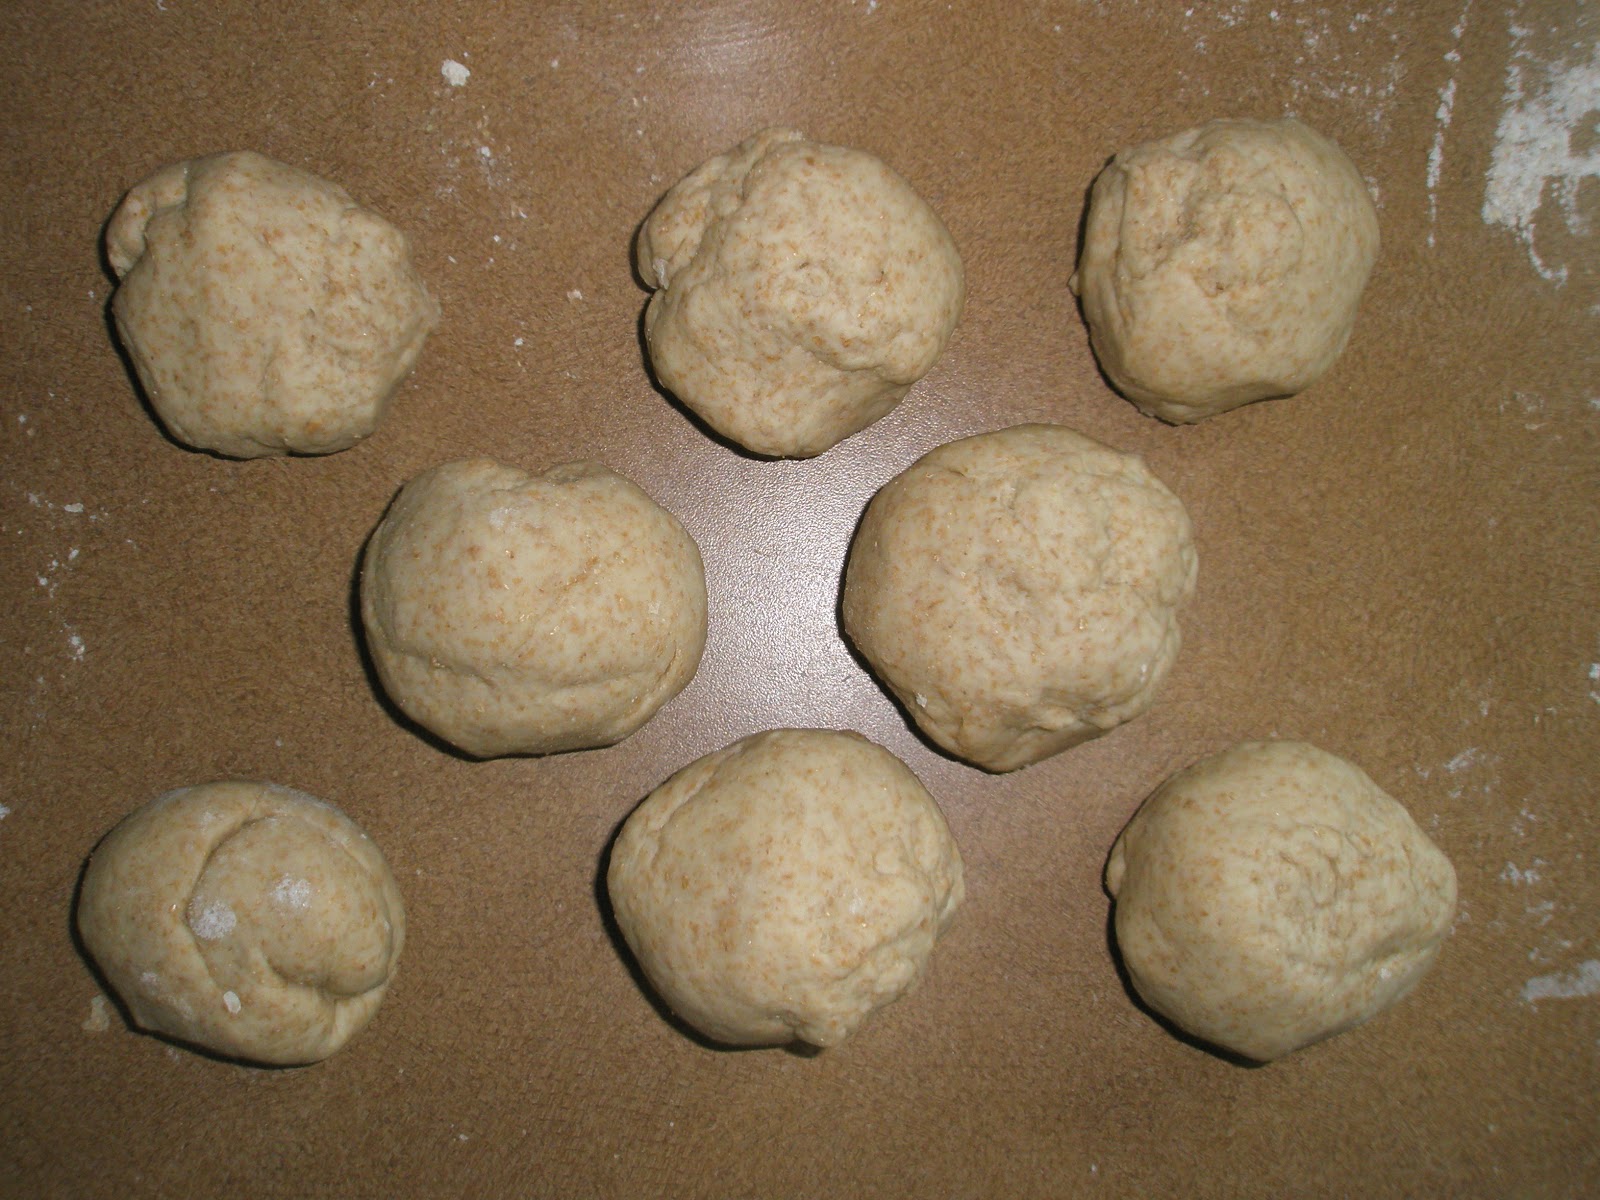
I started with the basic cinnamon roll recipe:


1 cup of milk (the recipe called for whole, but I do not keep whole milk handy) with 3 tablespoons of butter heated in the micro to melt the butter.
Add that to your stand mixer with: 1 cup flour, 1/2 cup sugar, 1 egg, 2 1/4 t rapid rise yeast, and 1 t salt
Mix for about 3 minutes. Then with mixer speed on low, add in another 2 1/2 cups flour. 
Once its all incorporated, trade out the paddle for the dough hook and let your mixer do its thing for about 8 minutes.
Then you need to oil up a bowl so that it coats your dough, cover it in plastic wrap, then a towel and allow to rise in a warm place for 2 hours. (For me, since its getting on to the cold time of year, my kitchen is rather cold. So my dough went into the bathroom with the door closed, its like a sauna in there!)


As my dough was having its two hour rise, I decided I'd try out my own filling:
Sugar, Cocoa, and Cinnamon.

 
In the bowl went: 3/4 cup sugar, 1 t cinnamon and 4 heaping teaspoons of cocoa. I thought 3 tsp of cocoa was fine, but I had the hubs try the mixture and he voted for the 4th tsp.

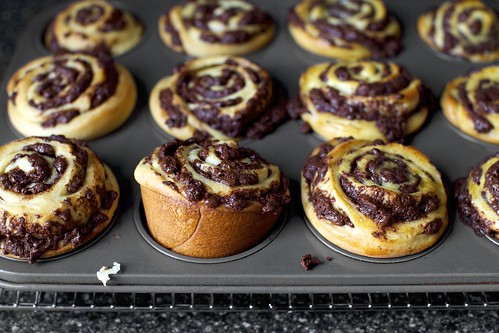
When the rise was finished, I rolled out the dough, smeared it with butter, sprinkled on my concoction, and rolled it up:


Since I was already experimenting, I went back to Mr. Foreign Language's blog to have a look at his pictures (is he writing in portuguese, maybe? It's not French, Italian, or Spanish...):

So I cut my roll up the middle and immediately began to panic because the outter layers began to fall off. But I persevered any way (at least it would taste good, if it didn't look pretty).


I twisted the halves back together, and thought, "Hey, this just might work!"


The next step was to pull the ends together to make it into a wreath shape, and voila! It was oven ready! Almost.

We still needed another 45 minute rising time (By the way, baking cinnamon rolls is really pretty easy, it just takes ALL afternoon).

Then it was oven ready!!!


30 minutes later:


It was time to dish up!


Now, what do two people and a ring of chocolate-cinnamon goodness do...

Oh,  help!


Friday, June 1, 2012

I Made Bagels!

I have to admit, I was intrigued when I found a recipe for home-made bagels. 
I caved when they said it was easy. 

Easy it was. 
It just took awhile. 
Three 20-minute dough rests. 

They taste like they came straight from the deli!
Can you smell them yet? 

I followed this recipe
I didn't vary from it, so please visit the site for details.


This is what's resting in the green bowl: 
oil, all-purpose & whole wheat flour, sugar, yeast, water

Kneading, kneading...


 ...and kneading. 10-minutes worth!

 The wonderfully elastic dough:


 Cut into 8 balls and resting for 20 minutes:

Then rolled into 8 dough snakes.

These did not roll out as easily as Play-Doh. 
I would know, I teach 6 & 7 year olds. 
Curled into 8 bagel-like rings.
And yet another 20 minute rest. 

Boiling:

In water. 
1-minute each side.
This is apparently the sign of a "real" bagel. 
A quick drip-dry:

And then onto the baking sheet!
After baking for 10 minutes on each side, they are done!
And soooo good!
Time-consuming, yes. But truly easy. 
And your kitchen will smell like a bakery. Bonus!
Thinking I'll make these again for our upcoming weekend camping trip.

Tuesday, January 31, 2012

Oatmeal Cookie Pancakes

Here's a simple, delicious, and wholesome adaptation of a classic breakfast food.
It is so like an oatmeal cookie, you'll feel like you're starting with dessert!

Begin with your traditional pancake batter, all mixed together.

To a double batch I added a cup of raisins and a cup of oatmeal.

Mix into batter. 
Adding a little extra milk to allow for some absorption by the oats.

Also, toss a cap-full of cinnamon into the mix.


Cook away on the griddle.


And in no time you'll have pancakes that remind you of my favorite cookie!


A note on "brinner." I rarely make breakfast food in the morning. I don't have time for it during the week, so we do fine with oatmeal, granola, cereal, yogurt, and assorted other quick starters for the day. On weekends, when I have time, I like to sleep in late and as a consequence, I wake up starving...we eat out for brunch regularly on weekends. Thus, brinner was born: breakfoods at dinner time. I have the time in the evenings to make my beloved, comfort-food meals.

Tuesday, January 3, 2012

Egg-Bread Scramble

Several months ago, my husband and I visited his brother in Bellevue, WA and we had a yummy brunch. I have been dreaming of the scramble I ordered ever since our visit and I decided I'd try to recreate it. My version was just as good as I remembered--Bonus!!!

This is a great way to use up the remains of a bread loaf.

1/3 of a left-over french loaf cut into cubes
4 whole eggs and 4 egg whites
 The only reason I used egg whites is because I had them left over in my fridge. Use all whole eggs or all whites. The amount of egg really depends on how much bread you are using and how many people you are feeding. My combination works well for 4 people.

Whip the eggs with some milk, like you're making scrambled eggs.
(Or use cream if you're being indulgent--remember, everything tastes better with extra fat, and I will always have 10 extra pounds to keep me soft! Ha!)

 You will need 1/2 cup diced mozzarella cheese and 4 diced scallions. 

Toast bread cubes in skillet over medium-high heat with some butter and olive oil. 

Trivia:
Did you know combining butter with oil helps to keep the butter from browning/burning?

 Pour eggs over bread and turn continuously with spatula. 
 When eggs are half-way cooked, stir in mozzarella cubes.

Finish cooking by popping frying pan into a 350-degree oven for 10-15 minutes.


Top with scallions, season with salt & pepper to taste, and serve!


Friday, May 27, 2011

Pizza

In case you've never met us before, this Heinzman couple LOVES pizza. We eat it at least once a week. We search out the good pizza joint while on vacation. We make it at home - and it's one meal I can get my husband to help make (everyone likes to try their hand at tossing pizza dough in the air).

In the past, I've use Jiffy mix to make my crusts and Muir Glen Organics marinara sauce. But this winter, thanks to my new favorite food magazine, Cook's Illustrated, I found a delicious dough and a mouth watering (I'm not exaggerating) sauce recipe. The magazine provides lots of tips and trick, but I don't pay them much heed. The directions I include below are the only ones I follow (and even then my direction following can be iffy. Teachers make the worst listeners and direction followers).

On a personal note: I don't like fussy, loaded down pizza. My favorite is "plain" cheese. Use good ingredients and don't mess with them. As you can see by the photos, my cheese pizza is anything but plain!

Dough (taken from Cook's Illustrated):

3 c bread flour
2 t sugar
1/2 t rapid-rise yeast
1 1/3 c ice water
1 T oil
1 1/2 t salt

In food processor, combine flour, sugar, yeast and pulse until combined. Run machine and slowly add water through lid opening and process until dough is just combined. Let stand for 10 minutes.

Add oil and salt, then process until dough forms a ball that pulls from the sides of the container. Remove and knead briefly on a lightly oiled surface until smooth. Shape into a tight ball, place in lightly oiled bowl, cover and refrigerate over night (the magazine says 24 hours).

Sauce (also from Cook's Illustrated):
This sauce is the only reason I am growing tomatoes in my garden. I want to can them for use in this recipe.


In food processor, process:
1 28-oz can whole, peeled tomatoes (Muir Glen Organics is my fav!)
1 T olive oil
1 t red wine vinegar
2 medium garlic cloves (minced)
1 t salt
1 t dried oregano
1/4 t ground black pepper


The pizza is sauced

Ready to eat!

In Maui. On our honeymoon. At a pizzeria.