Showing posts with label Grains. Show all posts

Monday, July 9, 2012

Granola

Oh my have I been busy! 
I thought summer was supposed to be a break.
I suppose I'm still disillusioned. 

I've been cooking quite a bit, actually.
Here's the thing: not everything I make is blog worthy. 

Shocking, I know. I'll give you a moment to recover...better now?
There are a few reasons for this fact.

1. Not everything I make works out. (Gasp!)
Take rice balls. Typing that, it doesn't even sound good. It tasted worse.

2. Not everything I make is all that original. (Double gasp!)
But say I try a recipe from someone else's site and I don't make it my own. Its already been done and it therefore not blog worthy. However, if someone else's recipe is a real coup for me, you'll hear about. Remember bagels?

3. I forgot to take pictures. (Oh #@$%!)
Darn it! This usually happens when I'm wrist deep in food and the hubs is not around. 

On to lovely granola. 
Remember how oatmeal is one of my favorite foods? Well, this recipe put it up on a pedestal.

I don't know why I ever bothered to buy granola at the store. Especially for $8 a pop!
The homemade stuff is so very, very, (very), tasty! My husband doesn't like store-bought granola, he'd rather just have cereal. Well, after making the first batch, I came home later to him devouring my newly made granola as a snack. 
Bye, bye breakfast. 

Kidding, this isn't really a problem. It's super easy to make.

However, I did hit a couple of hiccups in my recipe research. One of them being nuts.
I'm super-duper allergic. Can't touch the things with out breaking into a rash. Don't even get me started on the worst culprit of all-- PEANUT BUTTER!!! (I hate peanut night at bars).

EVERY granola recipe has nuts in it. Not a huge problem though, I just eliminated the culprit. 

The other issue was the necessity of ingredients I don't ordinarily keep on hand (flaxseed, coconut flakes, dried cherries, etc.). It's not that these ingredients are hard to come by, I just don't keep them in my pantry. And I didn't want to make a homemade batch of granola that cost $12 because I had to buy ingredients. 

Plus, I don't want the same thing every time. Granola, like oatmeal, is a blank slate for adding all types of nummy toppings (strawberries, bananas, dates, yogurt, chocolate & cherries, etc, etc...). Who wants to eat the same flavors everyday with all the possibilities that are out there?

Solution...I picked and chose what I liked from a variety of recipes and developed my own. 
(Yay for originality in a common food!)

The result is basically a spiced and sugared baked oatmeal. Or Amy's Granola (I like the sound of that).

5 cups old fashioned oatmeal or, one entire small canister.


2 t cinnamon, 1 t ground ginger, 1 t sea salt, 1/2 t nutmeg

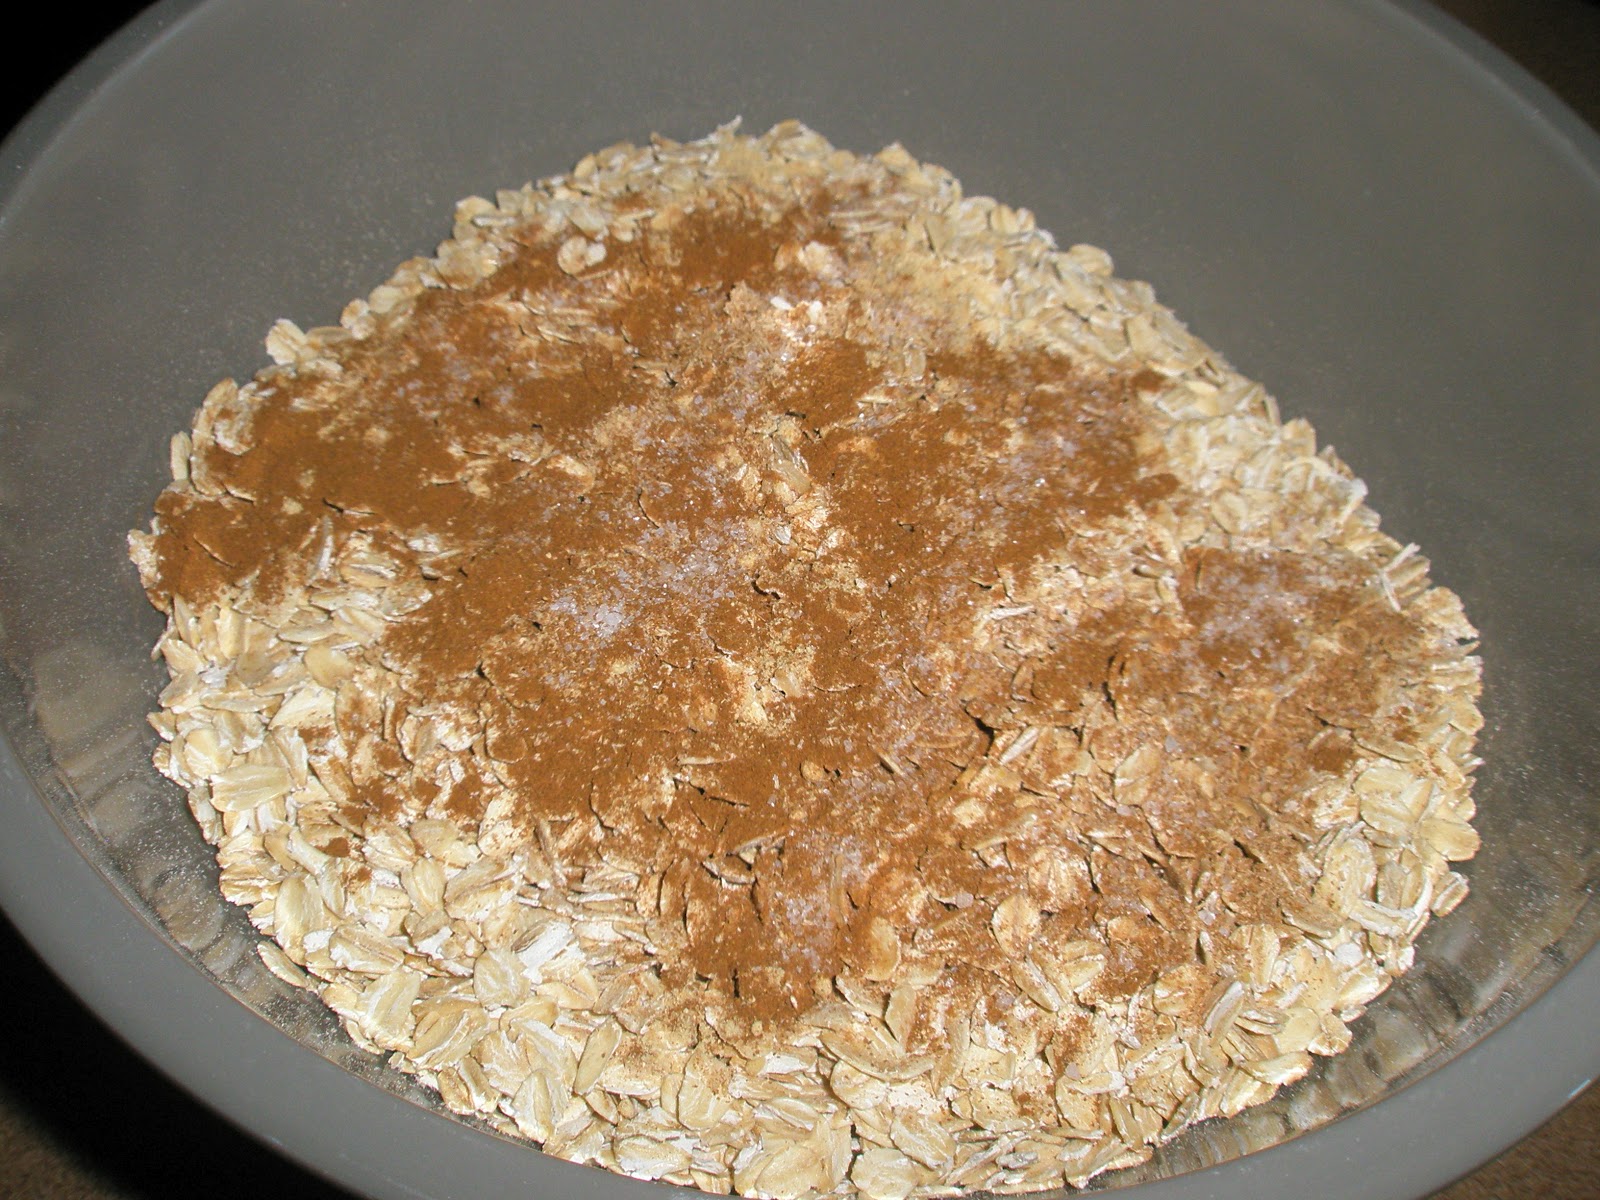
Add spices to oatmeal and mix together.


In a saucepan, cook over medium heat: 
1/2 cup olive oil, 1/4 cup honey, 1/2 brown sugar.
Here's a trick: measure out oil first, then use the same measuring cup to for the honey. 
When you pour the honey out, it won't sick to the sides of the measuring cup!
I discovered this by accident and thought, "Nice..."

Stir it up...

...until smooth and combined.

Pour over oatmeal mixture and stir to combine.

Spread over baking sheet lined with parchment paper or silicone sheets. I needed to use 2 baking sheets.
Bake at 300 for 45 minutes. Remove and allow to cool completely on baking sheet. 
Then you can break apart the granola. 
Place some in a bowl. Add milk and your own unique toppings. 

Friday, June 1, 2012

I Made Bagels!

I have to admit, I was intrigued when I found a recipe for home-made bagels. 
I caved when they said it was easy. 

Easy it was. 
It just took awhile. 
Three 20-minute dough rests. 

They taste like they came straight from the deli!
Can you smell them yet? 

I followed this recipe
I didn't vary from it, so please visit the site for details.


This is what's resting in the green bowl: 
oil, all-purpose & whole wheat flour, sugar, yeast, water

Kneading, kneading...


 ...and kneading. 10-minutes worth!

 The wonderfully elastic dough:


 Cut into 8 balls and resting for 20 minutes:

Then rolled into 8 dough snakes.

These did not roll out as easily as Play-Doh. 
I would know, I teach 6 & 7 year olds. 
Curled into 8 bagel-like rings.
And yet another 20 minute rest. 

Boiling:

In water. 
1-minute each side.
This is apparently the sign of a "real" bagel. 
A quick drip-dry:

And then onto the baking sheet!
After baking for 10 minutes on each side, they are done!
And soooo good!
Time-consuming, yes. But truly easy. 
And your kitchen will smell like a bakery. Bonus!
Thinking I'll make these again for our upcoming weekend camping trip.

Tuesday, January 17, 2012

Lean Times and (not) Enchiladas

Well, January has rolled around again and after the holidays, we're all feeling a little pinched. In the waistband and in the pocketbook. Am I right?

I literally revert to the most basic of meal ingredients during these times: rice and beans. I make a big batch on Monday and make it stretch as long as I can (though there's lots of "belly-aching" by the end. Ha! Another double entendre!).

The trouble comes along with how to make these simple ingredients have some variety.

I had a hankering for enchiladas the other night, but not the ingredients to make the real thing. It was a rice & beans week, after all. But I thought I'd experiment a bit, and it turned out quite well. My husband even commented after his first taste (He generally thinks my cooking is good and therefore only comments when I pry, or if it stands out).

So here you are, from my kitchen to yours:

Not Enchiladas

This made enough for my husband and I to have dinner and a "Left-Over's Lunch" 
(always my goal).

I started with pre-cooked rice and black beans. 
(I made a Crock Pot of beans on Monday and make the rice as I need it.)

The most important ingredient in any cooking experiment!


 I started by dicing half an onion, mincing 4 garlic cloves, and shredding a carrot.

Then I threw it all in a hot skillet with some olive oil until 
everything was soft and the onions were transparent.

I also added a dash of cayenne pepper and a cap-full each of cumin and chili powder.

 I mixed the cooked veggies with rice and black beans. 

 Then I wiped my pan clean and added a touch of oil.

I like to soften my corn tortillas by cooking them it a bit of oil.
This helps them to be more pliable as I form the enchiladas.

 Doesn't that look ready to eat now! 
(It's even better when you know its easy on the wallet and the skinny jeans)

But we're not done yet:

 Fill your baking dish...

Top with cheese...

And bake at 350 for 15ish minutes
(until the cheese is melted and bubbly).

While eating these, we decided they would be especially ooey-gooey good 
with cheese on the inside as well as on the outside. 

But since this is a post about being "lean," I didn't go there. 

Maybe in February when we've forgotten all about those pesky skinny jeans again.


 With hot sauce!

Monday, August 29, 2011

Quinoa Salad #2

This is inspired by a salad made at one of my favorite local restaurants. I think they added a lovely piece of salmon to the mix, which I chose to omit for this post.  
Start with salad greens freshly washed and torn. 
I used garden-fresh spinach, 
but in the middle of winter when that's not readily available, 
I'll use a bag of mixed baby greens.
 Top with a cup of cooked and cooled quinoa.
 Add 1/2 cup each dried cranberries and dried, diced apricots.
 Top with sunflower seeds (or sliced almonds).
 I tossed this salad with a store-bought champagne vinaigrette. 
Someday I will learn to make my own...


Saturday, August 20, 2011

Corn is in Season!

Corn is available everywhere right now: co-workers giving it away, trucks on the side of the road selling it for next to nothing, crates piled high at the local produce stand. 

Well, this is officially my new favorite way fix it. Delicious!


 Shuck and wash the corn placing each ear in the center of a square of tin foil. 


Squeeze a section of lime over the top.


Top with pat of butter, minced garlic, salt, pepper and cotijas (or feta) cheese*. 


 Roll the foil over the corn and cook on the grill. About 5 minutes. 


 Served here with salmon and couscous.

Cheater method:
(equally delicious)

Prepare corn: shuck, rinse and cook
Saute garlic in butter (one clove/pat per ear of corn), pour over corn
Squeeze sections of lime over corn
Top with salt, pepper and cotijas cheese.

*Note about grilling corn in foil: the cheese tends to stick to the foil.
There are two simple solutions to this problem:
1. top corn with cheese after it has been grilled and removed from foil.
2. scrape cheese off of foil and place onto corn (this solution allows all the flavors to mingle together during the cooking process).

Sunday, June 12, 2011

Quinoa Salad #1

This is my variation on a recipe I once saw in a magazine. I took off on the combination of chickpeas, quinoa and corn.

A note on measurements and ingredients:

I'm not very good when it comes to measuring, I think it goes along with the inability to follow recipes. But I've never found it to be that important: People have different preferences for flavors. Some like a lot of onion (I didn't use any in this salad b/c I'm trying something with my diet, but I think it would be a yummy addition), others like lots of corn. You might prefer some mushrooms, which this household doesn't like. Tofu would also be a soy-rific add-in. So amp up or tone down ingredients and trade them out as you like. For anyone needing more direction, I'm sorry. I tried to include amounts as I could. I should probably get better about this, since I'm writing a blog and all. Until then, here are the...

"Guidelines"

15 oz chickpeas (canned or from dried)
1 c quinoa (pre-cooked amount)
1/2 box Farfalle pasta
1 ear corn (or 1 c frozen)
basil
parsley
1/2 bunch radishes, sliced
favorite salad dressing (I used Annie's Organics Goddess dressing)
salad greens
Cotijas (or Feta) cheese, crumbled
sunflower seeds (or maybe some kind of nut? This is out of my jurisdiction.)

Be sure to cook quinoa, pasta, corn and chickpeas as necessary. Separately. In water or veg. broth. Don't forget to cut the corn from cob. I also rinsed everything in cold water so it wouldn't wilt or cook raw items.

Toss with dressing:
quinoa, pasta, corn, onion, chickpeas, tofu, radishes, and freshly snipped basil & parsley.


Spoon over salad greens.
Farmers' Market Spinach
Top with cheese and sunflower seeds.
Delish!

Monday, April 4, 2011

A Success!

I have attempted baking homemade bread many times and have always been disappointed with the results. Too heavy, too much starter to manage, too chewy, too this, too that... I even accepted a hand-me-down bread machine in the hope that it would produce good homemade bread, it has yet to do so.

Recently, I stumbled upon Frugal Living NW  and not only a bread recipe, but a recipe for homemade "artisan" bread. And I must admit, I was skeptical--it seemed too easy. So I put it on the back burner until I had some extra time. Little did I know that time was of no concern. This really was easy and the results were fantastic. Not only was it a simple, make-it-and-forget-it recipe, but the result was home-baked heaven. The crust was perfect. Not soft or soggy or tough, but firm and well, crust-y! The inside was soft, fluffy and substantial.

The first step was to mix all the ingredients, cover and let sit for 2 hours. Easy. Make loaves and bake or refrigerate for up to three days. Done. After a good 36 hours, I took the dough out of the fridge to make my loaves...and they were tiny. Oh no--another baking attempt gone awry!!! But I went forth to see the process through. I let my loaves rest, put slits in the tops and baked at 350 for 35 minutes. What a relief I saw it through...scrumptious! A success; a quality homemade bread recipe that I don't have to slave over. The loaves did grow a bit during baking, but were still on the small side. But who cares when the results are so mouth watering!!!!
Beautiful Bread

3 tiny loaves